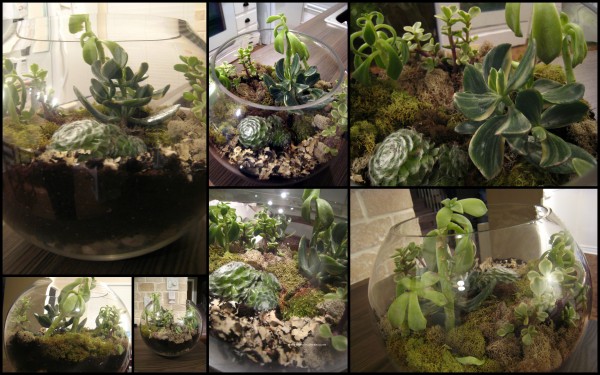
I have done it! I have finally used the plants that have been sitting on top of my fridge for 2 months, and the rocks sitting in the bookcase just as long, and the vases I bought at Home Sense 3 weeks ago for some good (this round one was a whopping $7.99). I have made my very first terrarium! Isn’t it pretty?
I’ve obviously been meaning to get to this for some time, and last night I just decided it was finally time. I got the remaining ingredients needed and got to work. Would you believe this only took me about 30 minutes to make? And that was with taking photo breaks and petting the dog/getting him off the table breaks! I quite love it. The little round fuzzy plants are my favourite. And the moss… love moss! Ok show and tell time! Here’s how I did it:
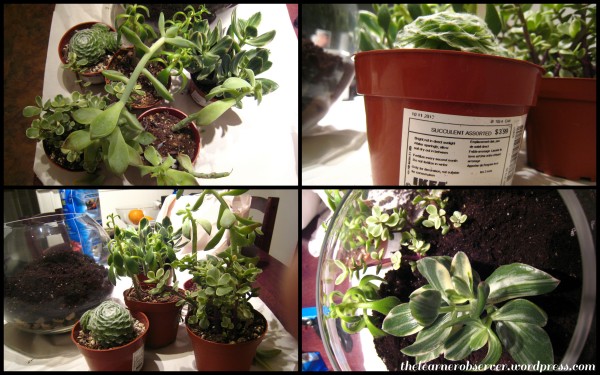
Step 1: Put rocks in. I used 2 bags (purchased at IKEA) because my container is very wide. The rocks are there for water drainage. Wouldn’t want to drown your little plants!
Steps 2&3: Add charcoal/carbon. I bought this little container in the pet section of Walmart. This is an important step because it keeps the water clean in your pretty terrarium so your plants won’t die. Now add the soil. I just got some regular potting soil for this. There are fancy schmancy soils out there, but my plants have been living in crummy IKEA soil on top of the fridge for 2 months – I didn’t think they needed fancy!
Step 4: Get your little pretties in there! Here are my beloved. You can also see the container with just soil in it. I have 2-3 inches of soil. You can use more, but probably not less. Some of these little plants have lots of roots, so they need space to grow. You can see I got my assorted succulents for $3.99 at IKEA. Good deal? Not sure… If they live I say yes!
Step 5: Moss. I happen to think the little plants look nice with just the new fresh soil, but I did add some fancy moss (purchased at Michael’s for $9.99, which was the moss variety bag). I like whatever that tan/brown moss is. It’s different, and the texture is so great! There’s some super fuzzy moss in there, but you can hardly see it. I might move it over to the edges for some more visibility.
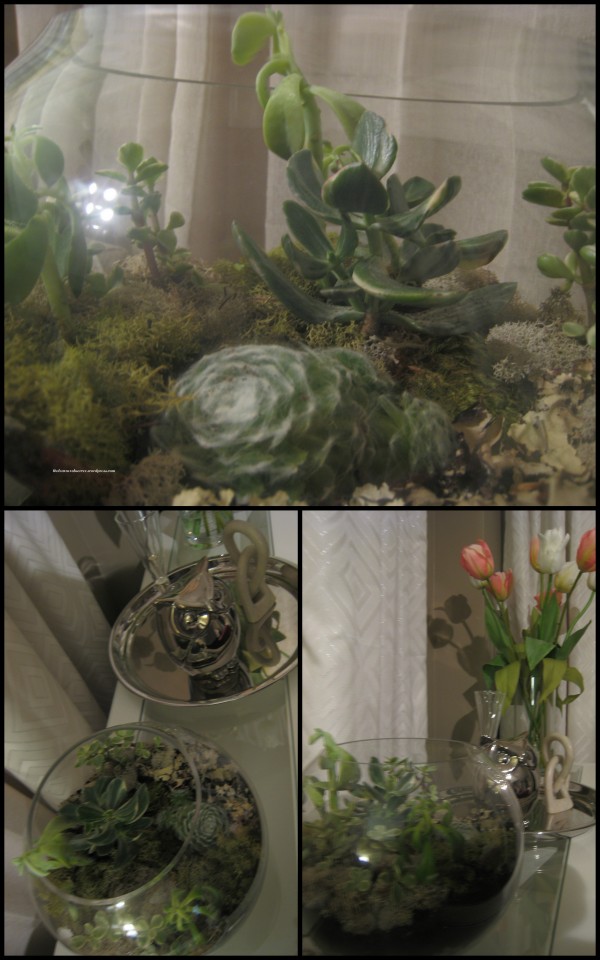
Step 6: Sit back and enjoy your little creation. Then get real up close and look at your mini-forest in all its cuteness. Awesome, right?
I moved the little forest from the kitchen to its new home – the living room. I like where it is because being beside the candy, I know our visitors will always get a peek at it! (Sorry about the picture quality on these – it was late and dark… not a good photo-taking combo!)
One last look? Ok 🙂
Here are the other 31 days of House to Home.
Linking up at these great places, including: The 36th Avenue, The Shabby Creek Cottage, House of Hepworths, WhipperBerry and My Repurposed Life —
Featured on Home Stories A to Z


Being a miniature-o-phile, I have been wanting to make a terrarium like this forever. Why I haven’t Googled how to do it before is beyond me, but with your information, here, I see how easy it is, and now I am inspired to REALLY do it. I could never understand how to keep it from getting algae or mold or just rotting the plants- your trick with the carbon solves that problem. You did a lovely job!
Thanks so much!!!! I hope I put enough of it in there. I’ll let you know in the next few weeks how the terrarium progresses. I’m itching to get some little deer and other animals in there now! Too much?
When it comes to whimsy, there is no such thing as too much. I am going to make a fairy garden out of mine when I do it.
ah! Amazing!!! I love it already.
How lovely and beautiful . I would love to have one as a gift . Remember …
hahaha I didn’t forget! I am in the process of making a special one for you mommy. Don’t worry!!! 😀
I am definitely using your post for when I make my own. I adore these and have been wanting to start some for a long time.
Awesome! So glad to read that!! I’m posting a second, possibly fancier one soon.:)
Hi, I found your link from the frugal girl’s link party. I’ve always wanted to know how to create a terranium, so thanks so much for sharing this! I like your post a lot, and am definitely pinning it to remember when I finally find some cute, little plants to create one.
Katie@ http://www.thecreativebubble.com
Thanks so much Katie! I’m so happy you liked it!! I’d love to see your terrarium when you get around to it.
This is pretty rad. It would be cool to make a bunch of mini-terrariums in Mason jars for gifts. You have always been a crafty one, Thalita!
Thanks Alex! Hilarious that you said that… I was planning on using Mason jars for Christmas terrariums, possibly with miniature reindeer and other Christmas-y minis. Totally kitsch, but possibly awesome? With your green thumb, you could make some awesome terrariums, I’m sure!
Love this! I have my fish bowl,rocks & plants all ready to go but have yet to get to this project!
It’s so worth it – I love looking at it! Good luck with yours. I’d love to see it once it’s done!
I like it! Great job. I hope they live. =)
haha Thank you!!! Me too!! 🙂
Love your take on the terrarium – so many fun plants! And the bowl is just perfect. One more thing I’m adding to my thrifting list.
Thanks Gillian! Can’t wait to see what amazing thrift find this will bring!!
Pingback: Do It Yourself Projects: Tutes & Tips Not to Miss {83} - Home Stories A to Z
Agreed!!! I’m looking for ways to have some mini ones around the house since they are so easy to maintain and the dog doesn’t seem interested (yet) in eating them!
Your terrarium looks cute! I wonder, though since these plants are desert plants how they will do. I hope they live forever!
gail
Thanks Gail! I hope so too!! So far so good.
thanks so much for taking the time to answer my question! can’t wait to make one and post about it 🙂